Azure Databricks was released into preview on November 2017 and GA was on March 2018. Data Factory announced its support for Azure Databricks on April 2018 and I kind of missed that. Maybe because it was at the beginning profiled more as a Machine Learning part of the Data Warehouse infrastructure.
My interest was awaken when I saw a presentation held at PASS Summit where Databricks was positioned as central part of Microsoft’s modern data warehouse architecture.
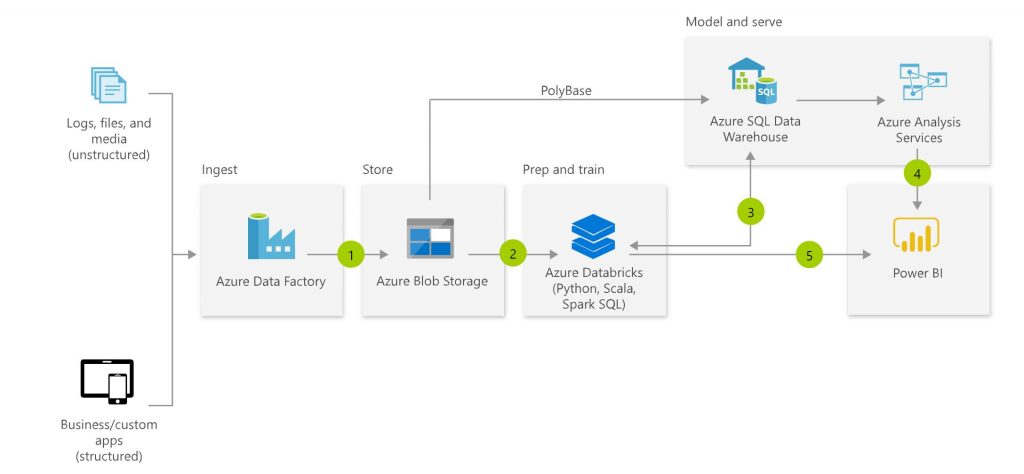
Point is to use Data Factory as a data sourcing and pipeline orchestration tool with its wide connectivity capabilities to different data sources. Data is stored first into Azure, e.g. into blob storage. Databricks is used to do required data transformations before moving data into proper database (e.g. Azure SQL Database, Azure SQL DW V2, Azure Snowflake) for reporting and analysis purposes. Note also, there is no mentioning about SSIS in this architecture.
My interest was very much enhanced when learning that Microsoft was building a graphical user interface within Data Factory on top of Databricks. That feature is called Data Flows and it’s at the moment in private preview. I was accepted to participate that private preview and I will be writing about that in my next blog.
Damn, there is so much out there I have already tested and I would like to write about, but new interesting things just keep popping up and you know, work and life…
But back to Databricks. I was a little bit skeptical at the beginning, because basically you need to code (Python, Scala, Spark SQL, R) when using Databricks. Fortunately I have some experience using Python and R and a lot of experience using SQL. Databricks itself has also good documentation and templates.
First you need to create Azure Databricks resource within your Azure portal, which is pretty straightforward.
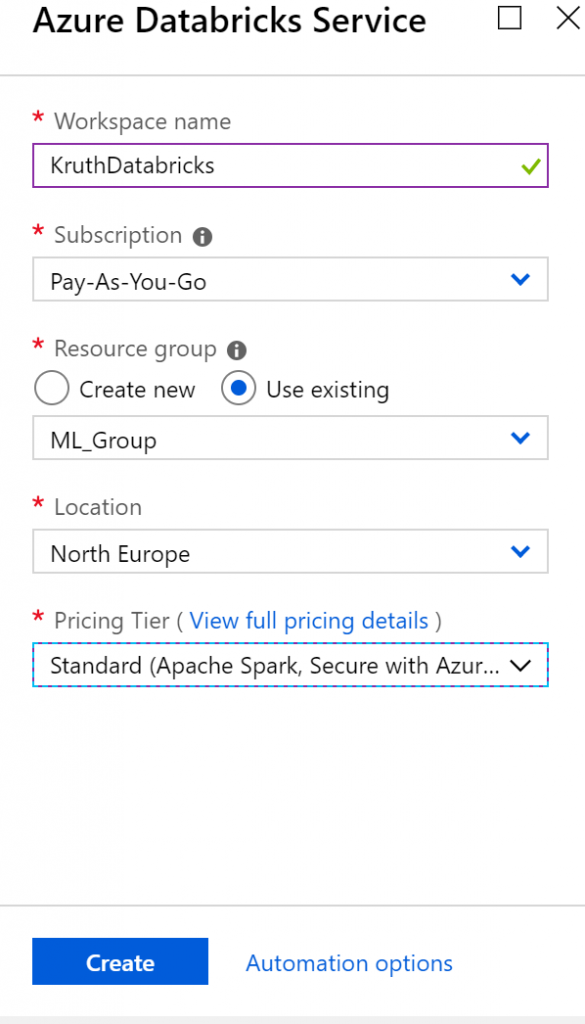
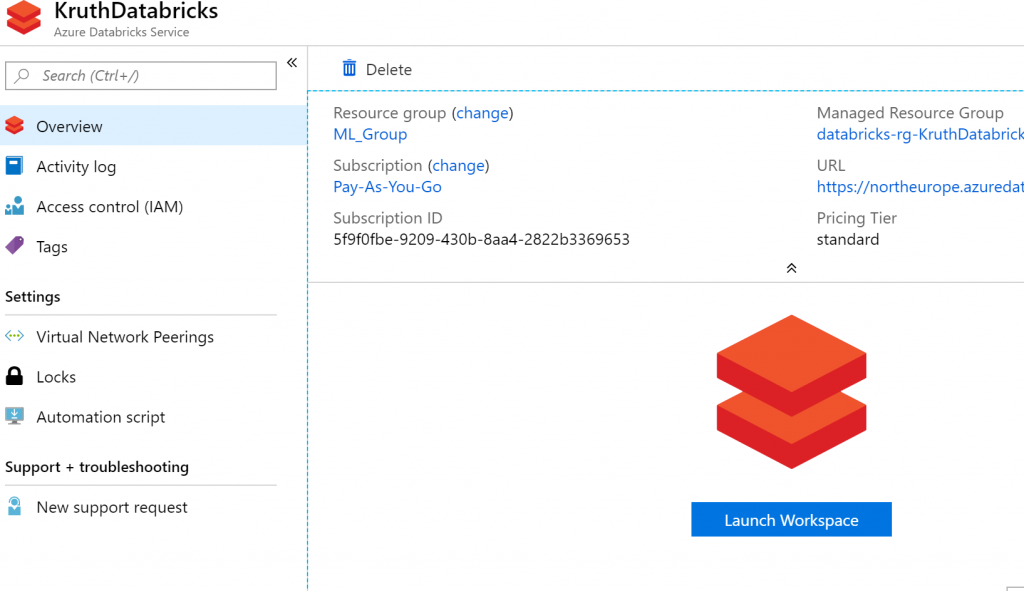
After it has been created, you launch Databricks workspace from your Azure resource.
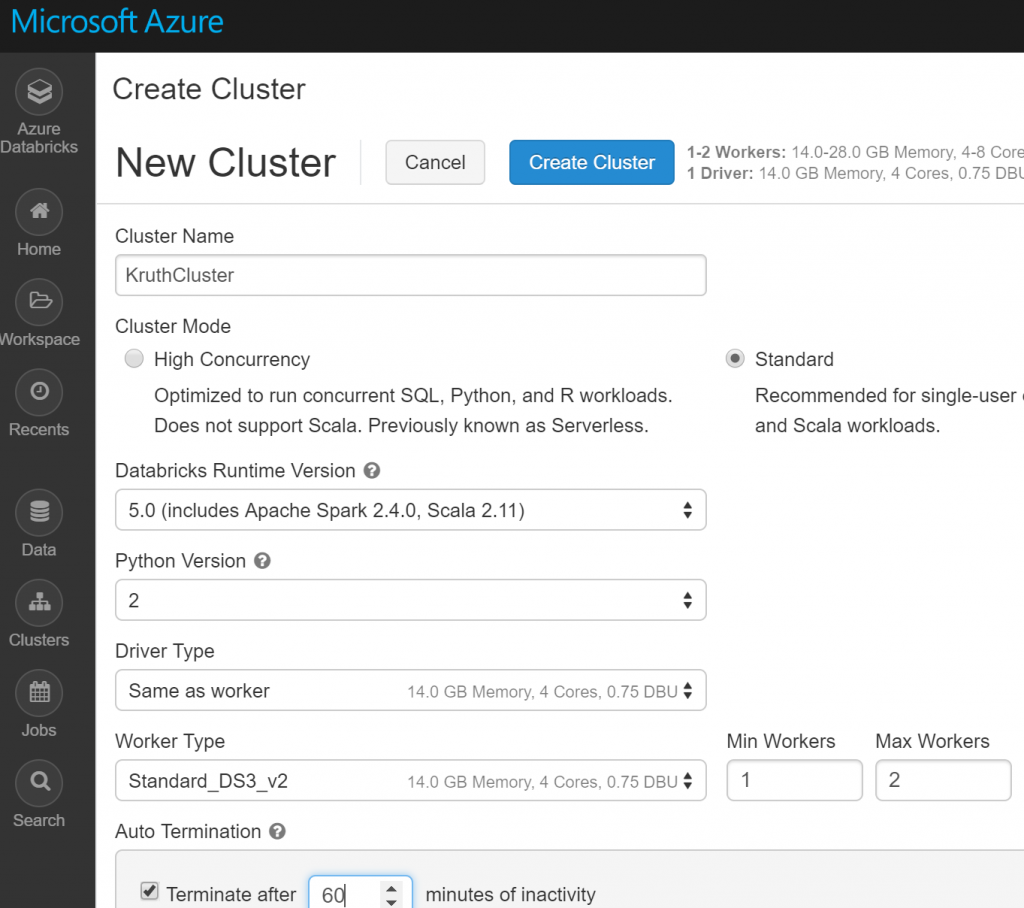
Within that workspace you can start writing your first Notebook, but without a cluster you can’t test your notebook code, which I noticed after a while (of course I didn’t read first ”Getting started” guide). In creating a cluster I faced my first set back. Creation failed and after investigations I found the reason was that my account has a limitation of 10 compute nodes. I think it’s some kind of default value. You can’t change that value by yourself, but that change needs to be requested. I did that and I got approval confirmation after few minutes. That was fast.
Other set back I faced while writing this blog. I created other Azure Databricks resource with the same name as my first one. It was allowed. Then I decided to delete it to avoid extra costs. It also deleted my original resource and all my work I had done on that resource! So, don’t do that.
Back to Databricks Notebook. It’s quite handy way of writing your code. You can do it step by step, block by block and also execute those blocks independently to test your code. To be able to execute your code, you need attach your notebook to the cluster you had created and started.

I wrote my code in Python, but there is a very handy feature where you can mix SQL or Scala into your code by using e.g. %scala at the beginning of your code block.
My test included reading two csv-files from my blob storage, joining data from those files and writing results into my Azure SQL Database. I joined my Databricks with the VNet where my Azure SQL is according to these instructions to allow access to my database:Azure Databricks VNet Peering.

Here is the code I used. First I defined connections to my files (not the real key):
storage_account_name = ”liigastorage”
storage_account_access_key = ”ayzSwCw7RBIp85dd6bWBLXH9YF0j7cF51Ynw+Div0z6L5qV/OyS6MhUtWQuN9l9wMNthlfNLTMKd9”
file_location = ”wasbs://trafi@”+storage_account_name+”.blob.core.windows.net/tieliikenne 5.1.csv”
file_location2 = ”wasbs://trafi@”+storage_account_name+”.blob.core.windows.net/Trafi_varit.csv”
file_type = ”csv”
spark.conf.set(
”fs.azure.account.key.”+storage_account_name+”.blob.core.windows.net”,
storage_account_access_key)
Then I created two DataFrames. Note, I misspelled first ”delimiter” and I took me a long time before I figured it out, because it didn’t give me any error message.
df_colors = spark.read.format(file_type).option(”inferSchema”, ”true”).option(”header”, ”false”).option(”delimiter”, ”;”).load(file_location2)
df_data = spark.read.format(file_type).option(”inferSchema”, ”true”).option(”delimiter”, ”;”).option(”header”, ”true”).load(file_location)
I renamed columns of the other DataFrame:
df_colornames = df_colors.toDF(’Code’, ’Name_fi’, ’Name_sv’, ’Name_en’)
Next the fun part, data transformations with SQL. First I created DataFrames as views:
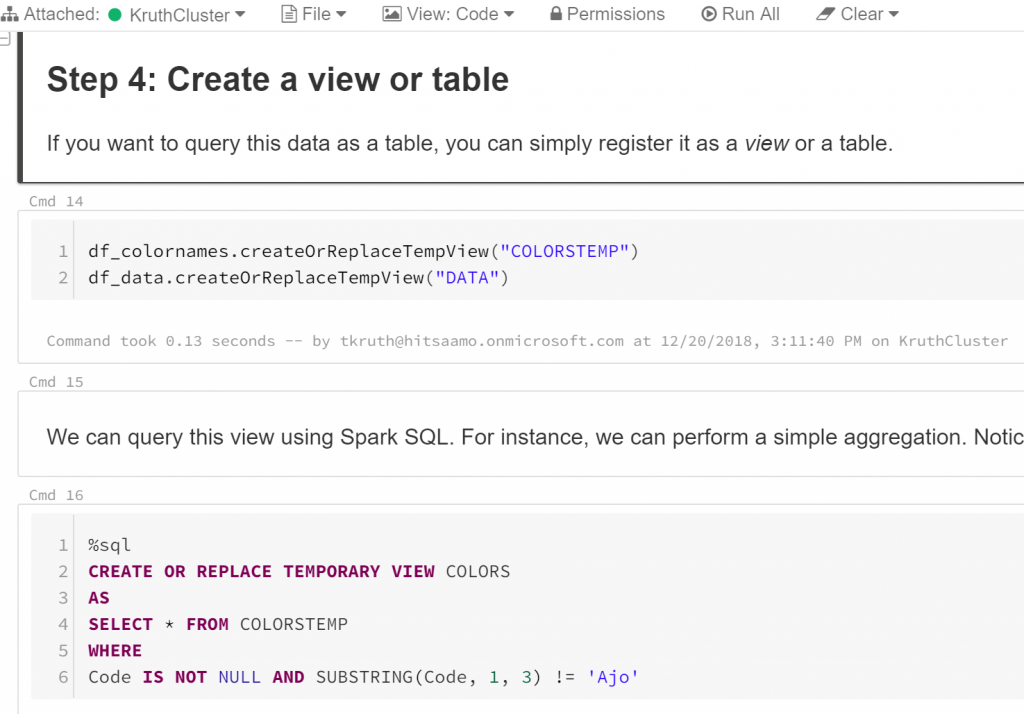
df_colornames.createOrReplaceTempView(”COLORSTEMP”)
df_data.createOrReplaceTempView(”DATA”)
Then some data cleansing and joining the data:
%sql
CREATE OR REPLACE TEMPORARY VIEW COLORS
AS
SELECT * FROM COLORSTEMP
WHERE
Code IS NOT NULL AND SUBSTRING(Code, 1, 3) != ’Ajo’
%sql
CREATE OR REPLACE TEMPORARY VIEW CARCOLORS
AS
SELECT A.merkkiselvakielinen as Merkki, A.mallimerkinta as Malli, B.Name_en as Vari
FROM DATA A
JOIN COLORS B ON A.vari = B.Code
LIMIT 100
Then I created a jdbc connection to my database and wrote the data into the table.
%scala
val jdbcHostname = ”kruthnesqlserver.database.windows.net”
val jdbcPort = 1433
val jdbcDatabase = ”KruthSQLDatabase”
val jdbcUsername = ”my_userid”
val jdbcPassword = ”my_password”
// Create the JDBC URL without passing in the user and password parameters.
val jdbcUrl = s”jdbc:sqlserver://${jdbcHostname}:${jdbcPort};database=${jdbcDatabase}”
// Create a Properties() object to hold the parameters.
import java.util.Properties
val connectionProperties = new Properties()
connectionProperties.put(”user”, s”${jdbcUsername}”)
connectionProperties.put(”password”, s”${jdbcPassword}”)
%scala
spark.table(”CARCOLORS”)
.write
.mode(SaveMode.Append)
.jdbc(jdbcUrl, ”Trafi”, connectionProperties)
Below a snapshot of the Databricks code editor so you can get also a touch on that:
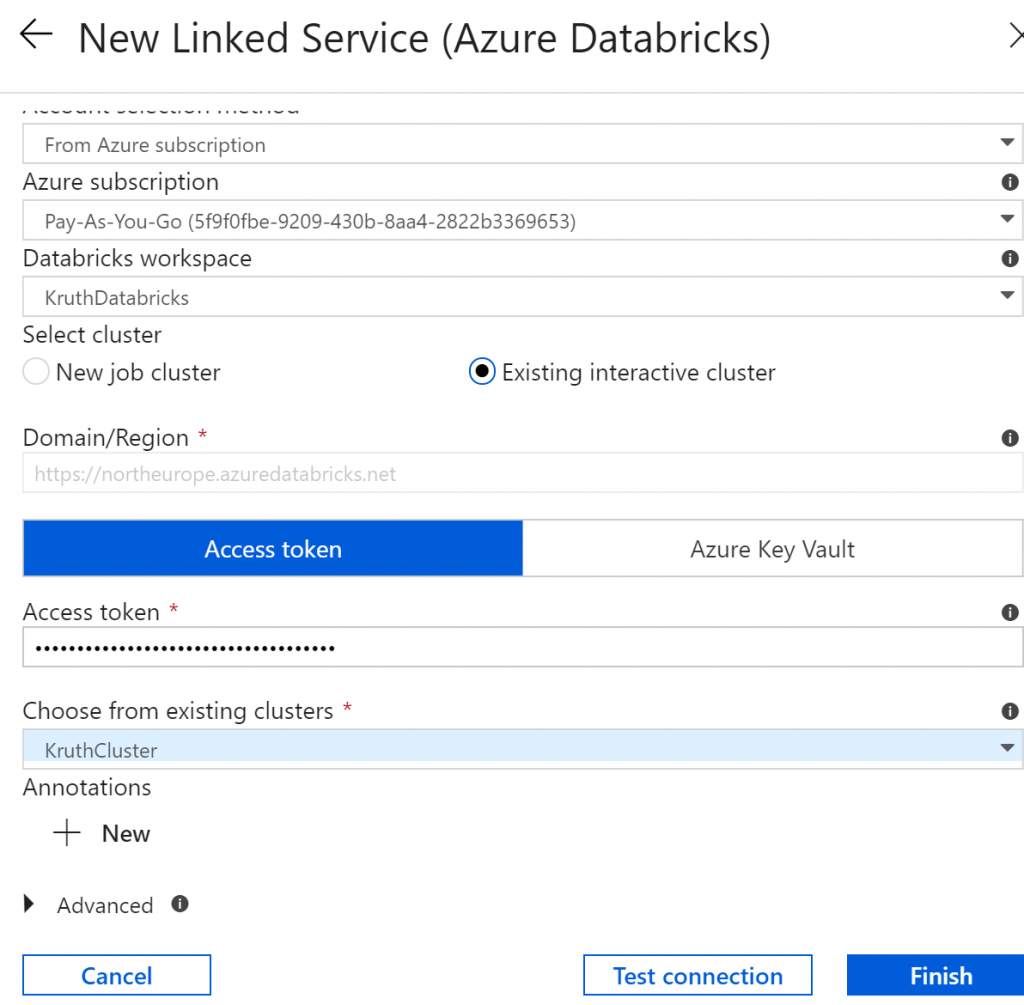
Finally it was time to move to Data Factory. First we need to create a linked service to Databricks cluster:
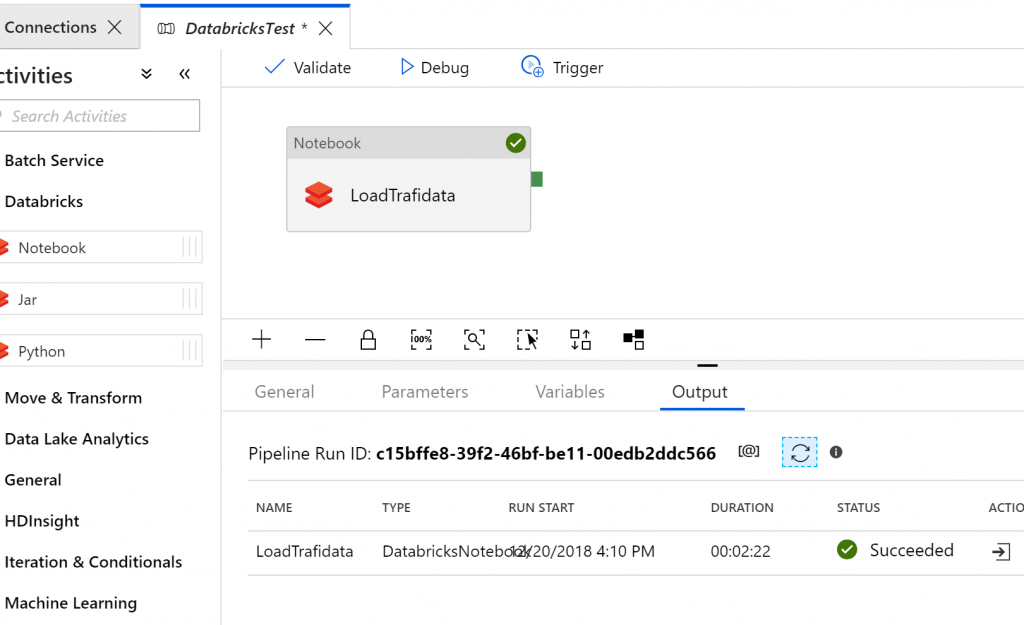
Then I created a new pipeline with only one task – Databricks Notebook. No need to copy data from source, because it was already in the blob storage and Databricks Notebook handled the data insertion into target database.

No need to remember the exact path, you can browse it. And that was it! Main source file was about 1 GB with few millions rows. Processing of it took about 2 min.
I would say this can replace doing data transformations in SSIS. But I’m really eager to start testing those Data Flows, which are now in preview.